Monthly Archives: October 2012

Artist Watch: Tom Whalen

Tom Whalen is an astoundingly talented illustrator, designer and werewolf hunter with a true love for the characters he depicts in his work, including some of my very own favorites – like Decepticon Communicator Soundwave, the evil sorceror Skeletor and the mute ninja commando Snake Eyes.

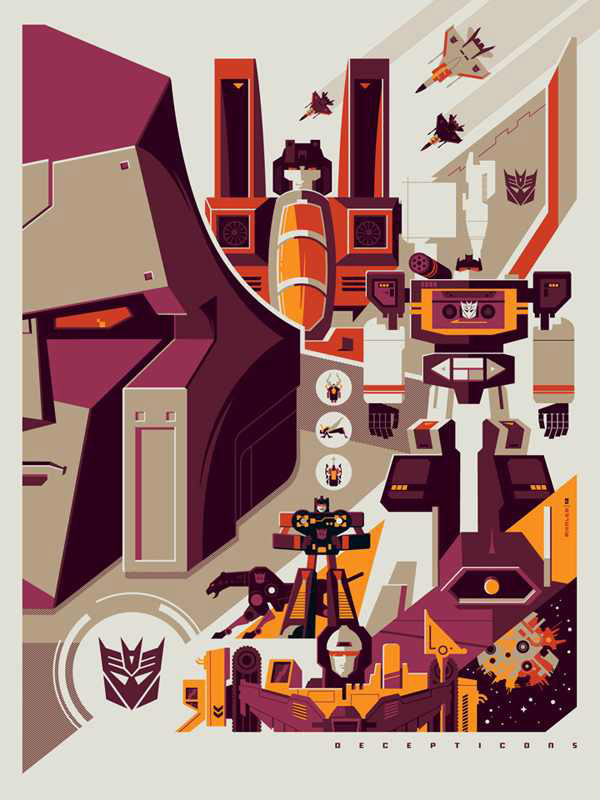
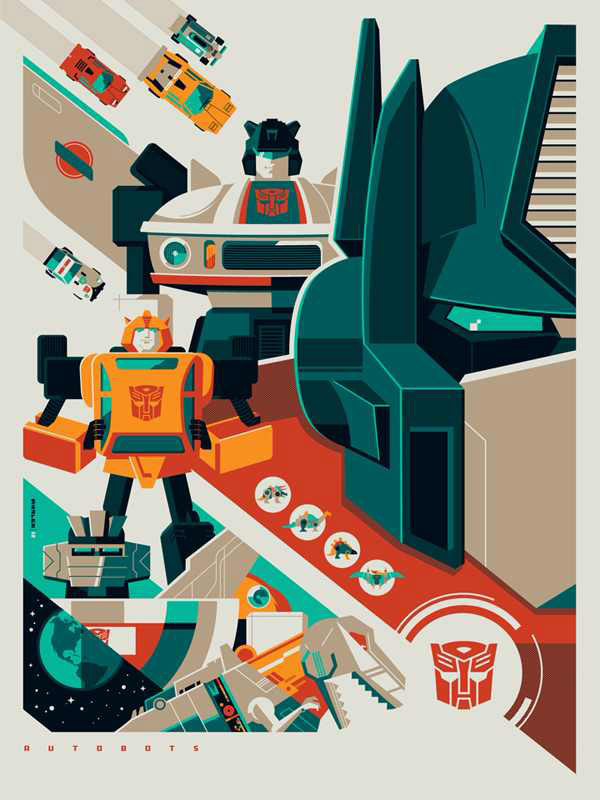
A limited edition of the two prints pictured here will be available from Thursday, October 11 through Sunday, October 14, 2012 at New York Comic Con booth 1681. Bold, colorful, inspiring and expressive – he shares my interests in super hero comic books, transforming toy robots and the complete domination of the Universe (kidding on that last one… maybe). After the Zombie-pocalypse when the robots inevitably take control, you can be assured Tom Whalen will be the official artist of Earth’s new metallic overlords!

Artist Watch: Tao Nyeu

‘Wonder Bear’ by Tao Nyeu is a really fantastic children’s book I found at Barnes & Noble recently.  The book takes you through a delightful journey with two children, a bear, and other animals!  Even though there may not be words, the pictures tell the whole story.  And a picture is worth a thousand words.  Check out more of her work here!

Artist Watch: Alli Coate

Alli Coate

Within the studio, we are always looking towards other art for inspiration.  I found Alli Coate through one of these searches.  Coates is a Rhode Island based illustrator, and her art work is a combination of illustration and applique/sewing techniques.  I really love the playfulness of her style– it’s so tactile and she uses the fabric patterns to set the mood for the pieces.  Check out more of her work at her website.

DIY Pop-Up: R2-D2

For this DIY Pop-Up you will need:

  • Cardstock or heavy construction paper
  • Scissors
  • Ruler
  • Paper clip, or ballpoint pen that has run out of ink, or a knitting needle
  • Crayons, colored pencils, markers

Instructions

1 Download the PDF templates and print out at 100% size (no scaling) on a heavy paper, such as cardstock.
2 Color all of your pieces with crayons or markers before scoring and cutting.

3 Using a ruler as a guide, take the rounded end of a paper clip and press along the dotted lines of the pop-up pieces and card.
4 Carefully cut out the pop-up pieces and card following the solid, black lines.
5 When you get to the top of R2-D2’s head, carefully cut on the solid black line into the center of his head.

6 Take your card, fold it in half and set it aside.
7 You should have 5 pieces total including the card.
8 Take your R2-D2 main body piece and fold it in half as shown. Place it back to its original position.

9 Now fold your R2-D2’s side tabs marked “D”, “F”, and then “E” on its first dotted line.
10 Continue folding the next dotted line on the same tab as shown.
11 Continue folding the last dotted line on the same tab as shown. Repeat the same three Steps to the opposite side tab “A”, “B” and “C”.

12 Apply a small amount of glue in area marked “Glue Here A.”
13 Line up the tab over “Glue Here A.” [Note: R2-D2’s back is facing you on this Step.]  Press firmly and let the glue dry.
14 Now place a small amount of glue in “Glue Here B” and “Glue Here C”.

15 Line up the tabs so that “B” and “C” are glued over areas “Glue Here B” and “Glue Here C.” [Note: Once the tabs are glued down, flip R2-D2 over, press firmly and let the glue dry.
16 Now apply glue to the other side on “Glue Here D”, “Glue Here E” and “Glue Here F”.
17 Line the tabs over their matching glue areas. Press firmly and wait for the glue to dry.

18 Close and open the card to crease well.
19 Fold the small triangle at the top of R2-D2’s head to the inside and apply a small amount of glue to the area marked, “Glue Here G”.
20 Start to close the card and carefully tuck the small triangle to the inside before you press firmly. Close the card completely and let the glue dry.

21 Open the card; it should now look like this.
22 Apply glue to area “Glue Here H” and “Glue Here I”.
23 Take R2-D2’s right leg and place it over “Glue Here H”. Do the same with his left leg on the other side for “Glue Here I”.

24 Apply glue to “Glue Here J”.
25 Take the Princess Leia Hologram piece and line it over “Glue Here J” and wait for the glue to dry, as this is very important. You’re almost done...
26 After the glue dries, close your card and press firmly.

27 Open your card! You’ve now completed your R2-D2 pop-up!

DIY Pop-Up: Boba Fett

For this DIY Pop-Up you will need:

  • Cardstock or heavy construction paper
  • Scissors
  • Ruler
  • Paper clip, or ballpoint pen that has run out of ink, or a knitting needle
  • Crayons, colored pencils, markers

Instructions

1 Download the PDF templates and print out at 100% size (no scaling) on a heavy paper, such as cardstock.
2 Color all of your pieces with crayons or markers before scoring and cutting.

3 Using a ruler as a guide, take the rounded end of a paper clip (or a ballpoint pen that has run out of ink) and press along the dotted line on the center of the card. Repeat for the all the dotted lines.
4 Carefully cut out all of Boba Fett’s pieces and card following the solid, black lines.
5 You will now have these four pieces scored and cut out.

6 Take the base page (card) and fold it towards you along the solid dotted line. Crease well and unfold.
7 Now take the piece marked with “Glue Here E”. Fold the piece away from you down the center dotted line. Crease well and unfold.
8 Now fold the lower left tab up towards you. Crease well and unfold.

9 Now fold the lower right tab up towards you. Crease well and unfold.
10 Now fold the upper tab that is grey away from you. Crease well and unfold. Set the piece aside.
11 Pick up the piece marked “Glue Here F”. Fold the piece away from you down the center dotted line. Crease well and unfold.

12 Fold the lower left tab up towards you. Crease well and unfold.
13 Fold the lower right tab up towards you. Crease well and unfold.
14 Now fold the upper tab that is grey away from you. Crease well and unfold. Set the piece aside.

15 Take the base page and put glue in the grey shaped marked “Glue Here A”.
16 Pick up the piece marked “Glue Here E” and line up the lower left tab with “Glue Here A”.
17 Press the tab down firmly and let the glue dry.

18 Put glue in the grey shape marked “Glue Here B”.
19 Line the lower right tab up with the grey shape “Glue Here B’. Press the tab down firmly and let the glue dry.
20 Now put glue in the grey shape marked “Glue Here C”.

21 Pick up the piece that is marked “Glue Here F”. Line up the lower left tab with the grey shape “Glue Here C”.
22 Press the tab down firmly and let the glue dry.
23 Now put glue in the grey shape marked “Glue Here D”.

24 Line up the lower right tab with the grey shape “Glue Here D”. Press the tab down firmly and let the glue dry.
25 Now put glue in the grey shape marked “Glue Here E”.
26 Now put glue in the grey shape marked “Glue Here F”.

27 Pick up Boba Fett and line his head and his arm up with “Glue Here E”. It will match up perfectly.
28 Once Boba Fett is matched up with “Glue Here E”, press firmly and let the glue dry.
29 Now that the glue is completely dry, slowly close the pop-up.

30 And open the pop-up… SWOOSH! It’s your very own Boba Fett!

DIY Pop-Up: C3PO

For this DIY Pop-Up you will need:

  • Cardstock or heavy construction paper
  • Scissors
  • Ruler
  • Paper clip, or ballpoint pen that has run out of ink, or a knitting needle
  • Crayons, colored pencils, markers

Instructions

1 Download the PDF templates and print out at 100% size (no scaling) on a heavy paper, such as cardstock.
2 Color all of your pieces with crayons or markers before scoring and cutting.

3 Using the ruler as a guide, take the rounded end of a paper clip and press along the dotted lines of the pop-up pieces and card.
4 Carefully cut the pop-up pieces and card following the solid black lines. When you’re done, you should have 5 pieces total, including the card.
5 Take your card and fold it in half. Set the card aside for now.

6 Take your C-3PO main body piece and fold it in half.
7 Now fold both tabs “A” and “B” towards you as shown in the photo. Crease well.
8 Flip the body piece over and fold the tabs “A” and “B” away from you. Crease well.

9 Take C-3PO’s head “D” on the main body piece and crease it towards you.
10 Now fold and crease C-3PO’s head “D” away from you.
11 Take his main body piece and push it back away from you so that the grey glue areas are in front of you.

12 Now push his head on the main body piece towards you. Set this piece aside for now.
13 Take his mid-section and fold the left tab “B” as shown away from you. Do the same to the other right “C” tab.
14 Fold the piece in half as shown. Unfold to its original position and set it aside.

15 Now take your C-3PO piece and apply a small amount of glue to the two areas marked “Glue Here A”.
16 Take your C-3PO mid-section and line up over “Glue Here A” so that the bottom edges of both pieces are straight on top of each other. Press firmly and let the glue dry. Set this piece aside.
17 Take the leg piece and fold it in half away from you.

18 Crease the corner tabs towards you starting with “E”, the left side of the leg. Repeat this Step on the right side marked “F”. Put it back to its original position and set this piece aside.
19 Now take C-3PO’s main body piece and apply glue to area “Glue Here D”.
20 Take his head and line it over “Glue Here D”. Press firmly and let the glue dry.

21 Place C-3PO’s arms in front of his body as shown here.
22 Apply glue to tab areas “B” and “C” on your card.
23 Align tab “B” and “C” directly over it’s corresponding “Glue Here B” and “Glue Here C”. Press firmly and let the glue dry. [Note: Tabs “B” and “C” will tuck under the mid-section.

24 Apply a small amount of glue to areas “Glue Here E” and “Glue Here F” on your card.
25 Take C-3PO’s legs and align them over “Glue Here E” and “Glue Here F”. Press firmly and let the glue dry.
26 Begin to carefully close your card. C-3PO’s main body piece will shrink inside his mid-section and his legs will swing up. Press firmly and let the glue dry.

27 Open your card! You’ve now completed your C-3PO pop-up!

DIY Pop-Up: Chewbacca

For this DIY Pop-Up you will need:

  • Cardstock or heavy construction paper
  • Scissors
  • Ruler
  • Paper clip, or ballpoint pen that has run out of ink, or a knitting needle
  • Crayons, colored pencils, markers

Instructions

1 Download the PDF templates and print out at 100% size (no scaling) on a heavy paper, such as cardstock.
2 Color all of your pieces with crayons or markers before scoring and cutting.

3 Using a ruler as a guide, take the rounded end of a paper clip (or a ballpoint pen that has run out of ink) and press along the dotted line on the center of the card.
4 Carefully cut out the pop-up pieces and card following the solid, black lines.
5 Carefully cut out the pop-up pieces and card following the solid, black lines.

6 Take the base page and fold it in half towards you along the black dotted line. Crease well and unfold.
7 Take the body piece of Chewbacca and fold away from you on the center dotted line. Crease well and unfold.
8 Take the right triangle tab and fold it towards you. Crease well and unfold.

9 Now fold the right triangle tab away from you. Crease well. Do not unfold.
10 Fold Chewbacca’s right arm away from you and then towards you. Unfold completely.
11 Take Chewbacca’s right arm and start to push it towards his chest as you are pushing the triangular tab up to close completely. Crease well. Unfold.

12 Take the left triangle tab and fold it towards you. Crease well and unfold.
13 Now fold the left triangle tab away from you. Crease well. Do not unfold.
14 Fold Chewbacca’s left arm away from you and then towards you. Unfold completely.

15 Take Chewbacca’s left arm and start to push it towards his chest as you are pushing the triangular tab up to close completely. Crease well, unfold, and set aside.
16 Now take the base page and put glue inside the grey area indicated with ‘Glue Here A’.
17 Take Chewbacca’s body piece and line up the left triangle tab with ‘Glue Here A’.

18 Press the tab firmly and let it dry.
19 Now lift up the right triangle tab out of the way; put glue inside the grey ‘Glue Here B’ shape.
20 Line up the right triangle tab with ‘Glue Here B’.

21 Press the tab firmly and let it dry.
22 Now put glue inside the grey ‘Glue Here C’ shape.
23 Take Chewbacca’s headpiece and line it up with the ‘Glue Here C’ shape. Press firmly and let dry.

24 Once the pop-up is completely dry, slowly close it shut.
25 Open the pop-up and it’s Chewbacca!

Artist Watch: Bovey Lee

When one mixes Chinese calligraphy, painting, and digital work you get the amazing artist Bovey Lee.  Lee uses all of these disciplines to create wonderfully intricate cut paper art that are full of life.  She has exhibited her work all over the world and has won awards as well.

Even though the pieces are usually massive, they’ll so delicate and painstakingly intricate.  Check out some of her work below and definitely dive into her website!

DIY Pop-Up: Millenium Falcon

For this DIY Pop-Up you will need:

  • Cardstock or heavy construction paper
  • Scissors
  • Ruler
  • Paper clip, or ballpoint pen that has run out of ink, or a knitting needle
  • Crayons, colored pencils, markers

Instructions

1 Download the PDF templates and print out at 100% size (no scaling) on a heavy paper, such as cardstock.
2 Color all of your pieces with crayons or markers before scoring and cutting.

3 Using a ruler as a guide, take the rounded end of a paper clip (or ballpoint pen that has run out of ink) and press along the dotted lines of the pop-up pieces and card.
4 Carefully cut out the pop-up pieces and card following the solid, black lines around the shape.
5 Once the pop-up pieces are all cut out, take your main Millennium Falcon piece and fold it in half.

6 Carefully cut along the solid black line on the center of the piece as shown in the photo.
7 You should have 4 pieces including the card.
8 Take your card and fold it in half. Set it aside for now.

9 Take your pop-up piece with the stripes and fold it towards you in half.
10 Fold the top right tab towards you. Crease well and put it back to its original position.
11 Now do the same to the other side.

12 Take your bottom right side tab and fold it up. Crease well and put it back to its original position.
13 Do the same to the other side.
14 Now take your next pop-up piece with the tabs marked “A”, “B” on them. Fold it in half so the center line is folds towards you. Crease well and put it back its original position.

15 Now take the bottom tab marked “B” and fold it up. Crease well and put it back to its original position. Do the same to the other side marked “A”.
16 Take your card and apply a small amount of glue on “Glue here A”.
17 Line up your pop-up piece with the tab marked “A”.

18 Press down firmly and let the glue dry.
19 Do the same to the other side applying a small amount of glue to “Glue here B”.
20 Line it up and press firmly. Let the glue dry.

21 Now apply a small amount of glue to “Glue here C”.
22 Take your pop-up piece with the stripes and line it up over “Glue here C”. Press down firmly and let the glue dry.
23 Do the same to the other side applying a small amount of glue to “Glue here D”.

24 Press down firmly and let the glue dry.
25 Now take your main Millennium Falcon piece and fold it half. Crease the top wing piece towards the right as shown.
26 And now crease it towards the left. Put it back to its original position.

27 Push the center round part of the Millennium Falcon and wing forward towards you using both hands. Now set it aside for now.
28 Apply a small amount of glue to “Glue here E”.
29 Take your main Millennium Falcon piece again and fold it in half over “Glue here E. Press firmly and let the glue dry.

30 Now do the same to the other side by applying a small amount of glue to ”Glue here F”.
31 Press firmly with both hands and let the glue dry.
32 Now apply glue to both tabs on the pop-up piece with the tabs.

33 Now press firmly with both hands and wait for the glue to dry.
34 With one hand holding the card, use the other to “pop” the Millennium Falcon towards you as shown in the photo. Remember to push the circular center part of the Millennium Falcon towards you as well.
35 Carefully begin to close your card.

36 Close it completely and press firmly for 5 seconds.
37 Open your pop-up Millennium Falcon!

Pop-Up Showcase: The Castaway Pirates

I’m always on the lookout for a clever, fun pop-up book. The Castaway Pirates (Chronicle Books, 2008), written and engineered by Ray Marshall and illustrated by Wilson Swain, is among my favorites.

The book’s jaunty rhyme is very funny and ends with a lucky twist, and the pop-ups and art  have unique styles. On his website, Ray Marshall posted a great explanation of how his book was made, from the original idea to the final production. If you’re curious about the process of making a pop-up book, I recommend it!